Tools
This page contains information about the tools and software used in the course. See the Resources section of this site for additional information.
All tools below are installed on the Linux and/or Windows machines of the DIVMS labs. To use those installations, you need first to log in to a lab machine. You can do that either
- directly, by using one of the desktops in 301MLH, or
- remotely from any computer connected to the internet and running the NoMachine client for Linux or the Remote Desktop client for Windows (see the CSG Linux help pages for how to install and use these clients).
Alloy Analyzer 4
Installing the Alloy Analyzer
If you want to use the Alloy Analyzer 4 on your own computer, please refer to website for downloading and installations instructions.
Using the Alloy Analyzer on CS Lab machines
The Analyzer is installed on the CS Lab machines. To use it on a Linux machine in the lab or on the remote Linux server- open a terminal;
-
at the terminal's prompt, type:
- java -jar /group/class/c_181/tools/alloy/alloy4.jar
- java -Xms512m -Xmx1024m -jar /group/class/c_181/tools/alloy/alloy4.jar
Using the Alloy Analyzer
Click on the Help menu in the Analyzer's top bar for a quick guide on how to use the tool.
Kind
Kind is a model-checker developed at the University of Iowa, currently available for Unix-like systems only. For convenience, we will use instead JKind, a third-party version of Kind developed by Andrew Gacek. JKind is written in Java and can be run on any system with Java 1.7. You can either download JKind and run it on your own computer or use the preinstalled version on the CS lab machines.
Installing JKind
If you want to use JKind on your own computer, you can get its latest release from GitHub. JKind requires that you also install one of the three supported backend solvers. The default is Yices, which must be downloaded separately.
Note: For JKind to be able to use the Yices executable, the directory where you put it must be in your path. Instructions on how to change the path environment variable can be found here. Also note that JKind does not have a GUI. It must be run in a terminal window in Linux/Mac OS or the command prompt on MS Windows.
Invoking JKind on CS Lab machines
JKind is installed on the CS Lab machines. To use it on a Linux machine in the lab or on the remote Linux server- open a terminal;
-
at the terminal's prompt, type:
- /group/class/c_181/tools/lustre/linux/jkind options file
Using JKind
To use JKind, you first need to prepare the Lustre file you want to check by specifying your observer node and the properties you are interested in. To do that, add the following special comment in the body of the observer node:
--%MAIN;Then add below that one or more special comments of the form
--%PROPERTY bool_var;where bool_var is any Boolean variable declared in the observer node, and encoding a property of interest, as in
--%PROPERTY R1;
After that, you can call JKind with that file.
For each property that it can solve within a given time limit or number of iterations, JKind will tell you whether it is valid (i.e., invariant), invalid or unknown. For invalid ones it will provide a counter-example trace, with inputs leading to a state where the property is violated.
JKind Command-line Options
The main options of JKind are:
| -bmc |
|
It looks only for counterexamples to the specified property(ies), which is generally faster than try to prove it(them). |
| -help |
|
Displays all options. |
| -n num |
|
Number of iterations of the main internal algorithm (default: 200). |
| -solver name |
|
SMT solver used as backend (default: yices; alternatives: cvc4, z3). |
| -timeout num |
|
maximum runtime in seconds (default 100). |
| -version |
|
Display the current version of the tool. |
Luke
Luke is an educational Lustre tool developed and kindly made available by Koen Claessen. It contains a Lustre simulator, a verifier, and a compiler.
Working with Luke on the CS Lab machines
Luke is installed on the CS Lab machines. To use it on a Linux machine in the lab or on the remote Linux server:
- open a terminal
- go to your home directory (or one subdirectory of your own choice) and at the prompt type:
mkdir Lukespace
- put any Lustre source files you want to check with Luke in the Lukespace directory
- move into that directory and execute as described below.
Depending on how you use it, Luke may produce output as html files in the directory Lukespace/Luke (which it creates). To see the content of those files simply open them with a web browser.
The procedure for using the Luke on a Windows machine or on the Windows server is analogous except that you shold replace linux with windows in the paths below.
Simulating Lustre Code
To simulate a Lustre program, you have to pick a main node. Then, if your file is file.lus and your main node is node, you can type:
/group/class/c_181/tools/lustre/linux/luke file.lus --node nodeThis will generate a file node.html in the Lukespace/Luke directory. Now, you can use a web browser to look at the result. (Or press reload if you were already looking at it!)
Examples of what a simulator produced by Luke might look like are here.
Verifying Lustre Code
To verify properties of a Lustre program, you will have to write a node that is a synchronous observer. Then, if your file is file.lus and your observer node is node, you can type:
/group/class/c_181/tools/lustre/linux/luke file.lus --verify --node nodeIf Luke manages to verify it, it'll tell you so, together with the maximal induction depth it used. E.g.:
Valid. All checks succeeded. Maximal depth was 1.
If your property does not hold, it will reply with something like this:
  *** CHECK FAILED ("file.lus", line 147):
  Falsified output 'OK' in node 'Prop' at depth 2.
  Counter-example generated in file 'Luke/Prop.html'.
In that case Luke has generated a trace in the file Luke/Prop.html
that exhibits the error. You can check that file using again a web browser.
Luke Command-line Options
| --node node |
|
The name of the top-node. This argument is mandatory! Example: --node main |
| --verify |
|
Verify all boolean outputs of top-node, and all checks. Default: (off) |
| --cutoff num |
|
Do not perform induction beyond depth num. If greater depth is needed,
a warning is issued. Example: --cutoff 20 Default: (off) |
| --int num |
|
Use bitwidth num for integers. If you want to be able to deal with
larger numbers, increase this. If you want your verification to go faster,
decrease this. Example: --int 32 Default: --int 16 |
| --verbose |
|
Display information about all steps of the induction while performing induction. |
| --root path |
|
A directory in which included files will be sought. Example: --root Library Default: --root . |
| --version |
|
Display the current version of the tool. |
| --help |
|
Displays all options. |
Windows version
Luke is available as an Windows executable here. You can use it from the command prompt similarly to the Linux version.
Lustre subset supported by Luke
Luke only supports a subset of Lustre. The following constructs are supported:
node, include,
bool, int,
if then else, pre, ->,
and, or, xor, not, =>,
=, <>, <, <=, >=, >,
+, -, *, /, %.
The following constructs are not supported:
arrays, const, assert, #, when, with, real.
Luke relaxes the following restrictions in Lustre (this is important if you want to use other Lustre tools). In Luke (contrary to Lustre):
nodes with no inputs are allowed,
= and <> can be used on type bool.
Dafny
Installing Dafny
Dafny is designed to be used with Microsoft Visual Studio. If you want to use Dafny on your own computer, you will need to have a Professional Version of either 2010 or 2012 Visual Studio installed . Visual Studio 2010 is installed on the Windows machines in the 301 lab in MLH.
To configure Visual Studio 2010 for using Dafny, on your machine or on the lab computers, you will need to follow the instructions listed below. (the procedure for Visual Studio 20102 should be similar.)-
Ensure that the Dafny Language Extension is not already installed on your current machine.
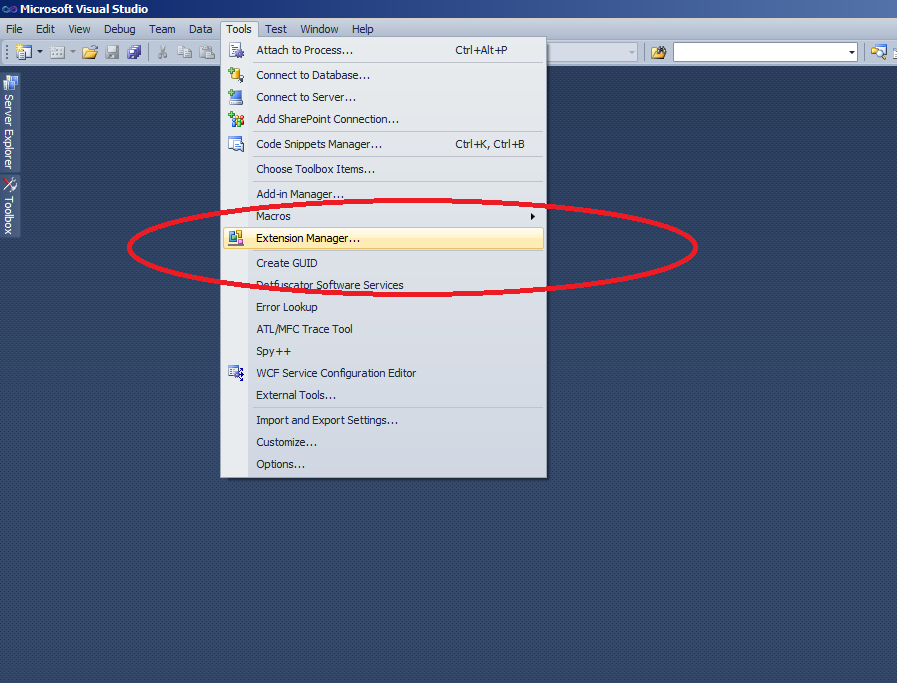
Open the Extension Manager as shown below.
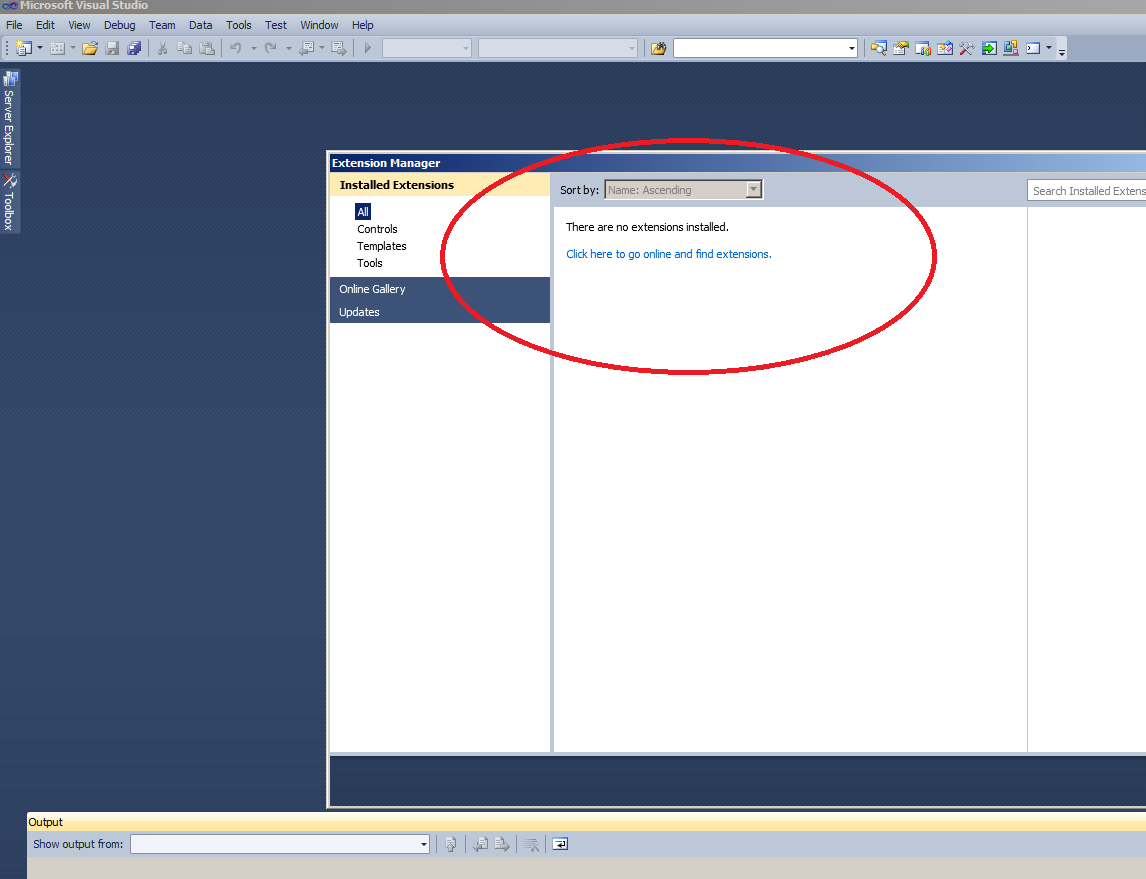
If you see Dafny Extension as shown below, un-install it.

Close Visual Studio 2010.
-
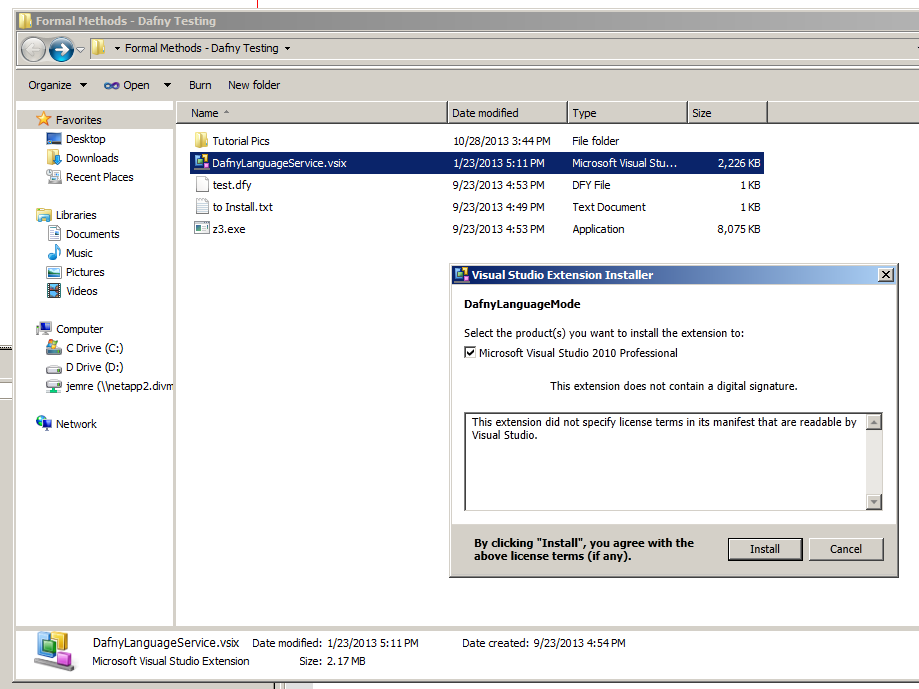
Download the Dafny Language Extension and double click on it.
Then click on Install in the Visual Studio Extension Installer.
- Open Visual Studio.
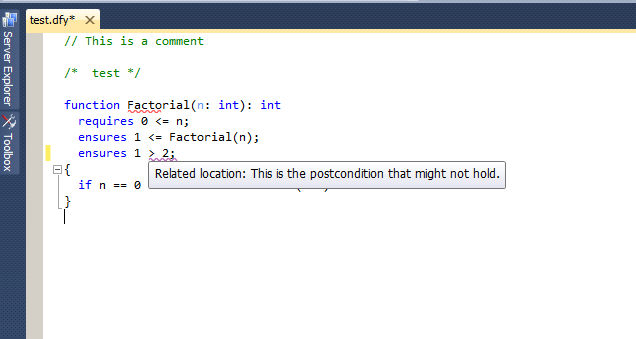
Using Dafny
Opening a Dafny file (.dfy) with Visual Studio will allow you to see syntax highlighting as well as some warnings when your specification does not hold.
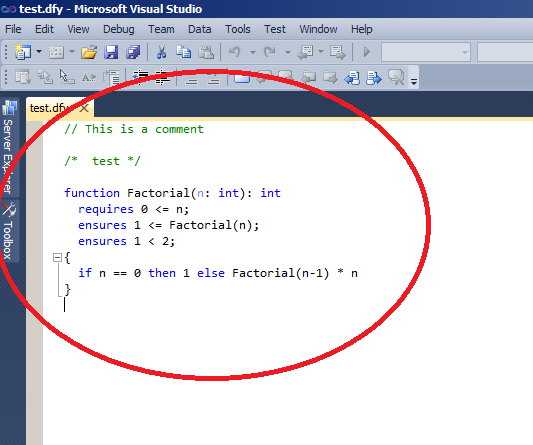
In this picture you can see that the condition ensures 1 > 2 might not hold. As such it is highlighted with purple.