Ingredients
You'll need the following:
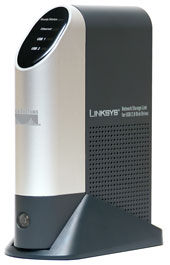
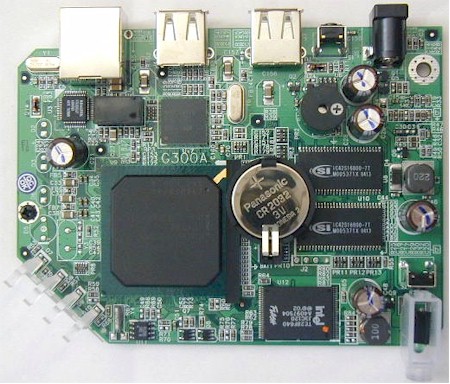
- An NSLU2, which is one of the least expensive ARM-processor appliances with a 10/100 Ethernet port, two USB 2.0 ports, a 133 MHz processor, 32MB RAM, and 8MB flash memory used to store the operating system. It draws about 500 milliWatts, has no moving parts or fans, and has ample computing power for nearly any basestation needs. The USB ports have the potential to attach Telos, a serial adaptor (for Mica-class motes), a webcam, Bluetooth, WiFi, and so on. Pictures of the unit (external and internal) appear below.
- However, the NSLU2 doesn't come "out of the box" ready to be a basestation. You'll need to install a new operating system (a version of Linux) and some supporting tools. There is some danger of ruining an NSLU2 if you're not careful. Please consult the web site http://www.nslu2-linux.org to learn more about this.
- A Linux (or perhaps a BSD, Mac, or other Unix) workstation, such as a laptop, to install and manage the NSLU2. You should have about two gigabytes available if you want to build everything, but it's OK to skip that initially and just try my basic system, in which case you'd need under 10MB to install.
- A TinyOS installation (I used Tinyos 1.1.13, but any recent version of 1.x should do).
- A pair of Telos (or perhaps Tmote Sky) motes for testing.
- An Ethernet hub and some Ethernet cables; or, you can do what I did, and use an Ethernet cross-over cable.
Recipe
- Read the instructions at http://www.nslu2-linux.org, and download some version of "Unslung". In doing this, you should agree to an Intel license to use the software.
The usual recipe for installing Unslung consists of (1) rewriting the program flash memory of the NSLU2, and then (2) moving the root file system from flash memory to a hard drive (attached via USB to the NSLU2) or to a USB flash disk. But remember, I'm trying to keep costs down (so you don't need to pay another ten or twenty dollars for a flash disk); also, inserting a flash disk in one USB slot and a mote in the other USB slot is a tight fit and may limit your options for future USB hacks). So, do not "unsling" your NSLU2 and make it dependent on having a USB hard drive attached.
- Also, download the program called "upslug2" (also explained here: http://www.nslu2-linux.org) and compile it.
- There are several ways to install unslug onto the NSLU2, all explained on http://www.nslu2-linux.org. It's somewhat confusing, all the different techniques. Here's what I do:
- On your laptop or workstation, enable a subnet for the NSLU2: its default IP address is 192.168.1.77, and I found the following command does the trick (as root, of course):
That gives eth0 an alternate IP number (in addition to whatever other IP number it already has for DHCP or whatever).ifconfig eth0:1 192.168.1.12
- Connect the NSLU2 and your workstation via a hub or a crossover cable. The NSLU2 should be powered off at this point.
- Put a toothpick into the back of the NSLU2 (the reset button), then power the NSLU2 on, keeping the reset button pressed, and watch until the Ready/Status light turns red -- then take out the toothpick. The Ready/Status light will alternate between red and green, meaning that the NSLU2 awaits a new flash image.
- Executed as root, the command
should list all NSLU2 waiting to be flashed (of course, you only have one, so it should be listed)../upslug2
- Executed again as root, the command
will install new software on the flash memory of the NSLU2. Of course, substitute the mac-address and the name of the unslung-flash-image as appropriate. The upslug2 program has a nice visual display of its progress as it rewrites the flash. When it finishes, the NSLU2 reboots../upslug2 -t (mac-address) -i (unslung-flash-image)
- After the NSLU2 reboots, wait for the beep signalling it is ready. Then, using a web browser, try http://192.168.1.77 to see the result. That should allow you to look at various things. I haven't tried them all myself. To do the administrative part, you may need to supply user and password (admin for both). Once in the administrative menu, you can tell the NSLU2 to halt and it will power off, or restart and it will reboot, etc.
- If you'd installed Unslung (or the TOSBaser), then you can also enable telnet access to the NSLU2. Once you do this, you can
and log in as root (default password is uNSLUng), look at the file system and so on. Note: sometimes telnet takes a minute or two to respond on the NSLU2 (but this only happens the first time after reboot).telnet 192.168.1.77
- After you've mastered the recipe for installing a new flash image onto the NSLU2, it's time to download the TOSBaser image, which is just a small modification to Unslung. Download it here (right-click, save as). To get the user and password for this download, you'll have to convince me that you've agreed to the Intel license and that you won't sue me if you break your NSLU2.
- Program your two telos motes, one with CntToLedsAndRfm, and the other with TOSBase. For instance,
(I assume you already know how to work with TinyOS and change the above as appropriate).cd $TOSDIR/../apps/TOSBase make telosb install.0 bsl,6
- Install TOSBaser.bin onto the NSLU2. As it reboots, insert the TOSBase mote into the "Disk 1" USB port. I'm not sure, but I think that if the TOSBase mote is not present, the program will fail.
- Turn on the CntToLedsAndRfm mote, and you should see the LED blinking on the TOSBase mote.
- After the NSLU2 finishes rebooting, enable telnet on the NSLU2 (via a browser) and then telnet to the NSLU2. If you execute the ps command, you should see the serialforwarder program running (called sf here). Then, try
and you should see lots of packets being dumped (Cntl-C to quit).sflisten localhost 9001
- To prove this was no miracle, log out of the NSLU2 and then, on your laptop, run
and you should see the same thing as you did as root running on the NSLU2. Note: sflisten is found in $TOSDIR/../tools/src/sf along with other handy non-bloatware.sflisten 192.168.1.77 9001
Still To Do
Here is a list of only a few of the many things I haven't done.
- As well as having fdti_sio support in the Linux kernel modules, add the pl2303 as well and test Mica2/MicaZ basestation support.
- The Linux kernel does have Ramfs support, and there's about 14MB of memory available, so the NSLU2 could be running a significant basestation application to store the data and even present web services for access to this.
- Of course, for that matter, one could just completely unsling, use the other USB port for a hard-disk, and then have the whole suite of Java, Python, Matlab, etc, which seem to be in fashion for sensor network support.
- A cool hardware hack would be to open the NSLU2 case (I have), remove the battery holder from a Telos, and permanently mount the TOSBase telos inside the NSLU2. What a compact, nice basestation that would be. Add an external antenna, power the NSLU2 with batteries, weatherproof it and add solar recharging, and you could have the makings of a serious field basestation.
- Even cheaper? There may be alternatives to the NSLU2, as there are other NAS devices around, such as the TS-U200. At present, prices aren't that much lower for the alternatives, so I'll stick with the NSLU2.