1. Preparation of Sections for Photocopying
Part of
the Bookbinding Tutorial
|
Once you have concluded that a paperback is beond repair, the first step in preserving its contents is to complete its destruction. Slice off the glued spine of the paperback so that the pages come apart as separate sheets. You can cut the sheets from the spine with an X-acto knife, or you can find a shop with a paper shear that will cut the spine loose. Here in Iowa City, one of the larger copy shops has a shear; they charge $2 a cut, which isn't a bad price considering the total cost of the project.
Keep the pages in order after you cut them free, and keep all the pages, including blank leaves in the front and back of the book! In making up the sections to be bound, you will generally find that you need these blank pages in order to make the sections come out even.
The next step in the process is to tape the loose pages into pairs for copying. This not only saves paper -- you can easily copy two pages of a typical paperback on each side of a standard sized 8.5" by 11" sheet of paper, but it is also necessary for a durable sewn binding.
Take a look at a high quality hardback book to see how it is constructed. You will find that the pages are organized into groups, called sections or signatures, where each section is folded down the middle and then sewn to the binding. Each section typically consists of from 4 to 16 sheets of paper; the number of sheets of paper in a section is almost always a power of two because the pages of a section were originally printed on a single large sheet of paper that was folded and re-folded prior to binding and trimming. (The most common exceptions to the power-of-two rule result from the manual addition of extra pages to some sections of some books.) If you follow the instructions given here, you will very likely reconstruct the sections from which your paperback was originally made.
I have found that "Scotch Brand Post-It Tape" works very well for joining the pages of a paperback into pairs for photocopying. It took three rolls to make up DEC's "Introduction to Programming, a 608 page pulp paperback, counting all the pages, not just the numbered ones.
In taping together the pages into pairs, note that you need to leave space between the pages for folding and binding. The margins on some paperbacks are small to nonexistant, so merely butting the pages together won't always leave sufficient space. You can assure yourself uniformly spaced pairs of pages by making an alignment jig, or should I say, drawing such a jig, on a sheet of 8.5" by 11" paper (the same size paper you will be making your photocopies on).
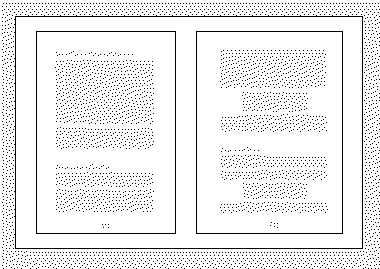
Note that two pages of a typical paperback, when placed side by side, are slightly smaller than a sheet of typing paper. You will need a margin in the middle of each copied sheet to sew the binding and similar margins around the edges are appropriate, particularly if you intend to trim the book after it is bound. Set two sample pages on your jig and adjust them until the margins look good, as in Figure 1.1, and then mark their outlines on the jig and use these marks to align every pair of pages prior to taping them together.
|
|
The gap between the outlines of the two pages must be narrower than the white tape you use to pair up the pages, enough narrower that a strip of tape can get a firm grip on each page without covering any print.
Note that many pulp paperbacks were cheaply made, and this frequently means that the text was poorly centered on some of the printed pages. As a result, you may have to shift pages one way or the other in some cases in order to center the text on each page. It may help to tape up your pages on a light box so you can easily see where the text on both sides of each sheet falls relative to the margins you've drawn. If the text is well aligned, the work will go more quickly if you glue strips of cardstock to the alignment jig along the bottom and outside edges and then use these to align the pages.
As an aside, if you're taping up 8.5" by 11" pages, perhaps typescript or laser printer output, you can make these up into 11" by 17" sheets and then use between a 64 and a 77 percent reduction to put these on 8.5" by 11" paper. The reduction to use depends, in large part, on the margins available on the originals. If the originals had wide margins, the smaller reduction can be used (with care in centering), while if the originals had narrow margins, a greater reduction will be needed, along with some space between the original pages to give a margin for folding and sewing.
Now you are ready to set to work. Take the stack of original pages, in order, right side up, and turn over the top 8 sheets, placing them beside the stack as if they were still bound to a common spine. Then pick off the top sheet of the left stack and put it on the left square of your jig and put the top sheet of the right stack on the right square of your jig, and tape them together, being careful not to shift their alignment. If you use something like Post-It tape, it will stick to your jig in the gap between the two pages being taped, but it can easily be peeled loose.
Pause to doctor any dirt specks, pencil marks or other marks that might spoil your photocopy. I use bits of Post-It tape to cover these, and I erase pencil marks if the paper will tolerate erasure. Where the original text was obliterated by ink, I type replacement material on Post-It tape and stick it in. Once this is done, I flip the pair of taped together pages, tape them together on the flip side, and doctor that side, if needed, before setting the pair of pages aside.
Do not turn over pages except when turning blocks of 8 or when flipping pairs of pages, an operation done once with each pair! This greatly simplifies keeping the book in order through this process!
Keep making pairs of pages, where each pair consumes the top page from each of two piles of unpaired pages, until you have exhausted the smaller pile. At this point, you will have a pile of 8 pairs of pages. this is the prototype of one section of your reprint of the book. Having carefully set aside your finished section, turn another block of 8 pages and repeat the process, reconstructing the next section.
In copying DEC's 1973 Introduction to Programming, I found (from occasional ink smears and other printing defects) that the 8 sheet sections I reconstructed were replicas of the original sections that had been folded and bound in the original paperback. The book was made of 19 such sections, which comes to 152 double sheets of paper. In the original printing, each section was printed on one sheet of newsprint that was then folded 4 times and cut to size before being glued into a paperback binding.
Once all the pages are taped up, you're ready to have them copied. Ask the copy shop to use acid free paper, at the very least. You may want to ask for archival paper or lightweight acid free bond, but be aware that some paper sold as bond or as archival paper is unnecessarily thick for folding and sewing into a book. Some copy shops may have access to paper with a known grain direction. If possible, ask for cross-grained paper so that it will fold more easily. (Long grain paper folds more easily along the long dimension of the page, cross-grained paper folds more easily along the short dimension.)