8. Making a Dust Jacket for your Book
Part of
the Bookbinding Tutorial
|
The cardboard cover of the book you just made has threads that show on the outside, and it has no title or cover art! You can add artwork, hide the threads and protect the binding with a paper dust cover. I used 11" by 17" paper to make a dust jacket. This is double the size of the typing paper on which the book was copied, and the largest standard size paper most photocopiers will handle.
If you're lucky, you'll have an original cover that you can photocopy onto the dust jacket for cover art, but by the time a book has reached the point where this kind of copying and rebinding project is worth while, this is unlikely. I did some cut-and-paste work with photocopies of parts of the body of the book to reconstruct an approximation of the typography used on the tattered original cover, then photocopied this onto a colored paper dust jacket before cutting it to shape.
Figure 8.1 shows a general plan for a good archival dust jacket:
|
|
Note that care is needed in folding in the two sides of the dust jacket, crease B in Figure 8.1. If these are folded tightly over the ends of the cover with the book open, the dust jacket will be too tight to allow the book to be properly closed. Ideally, you should first close the book, then wrap the jacket (with fold A already completed) around the book, and then fold in the ends, cracking the cover open only as far as needed to tuck the large end flaps in between the cover and the pages of the book.
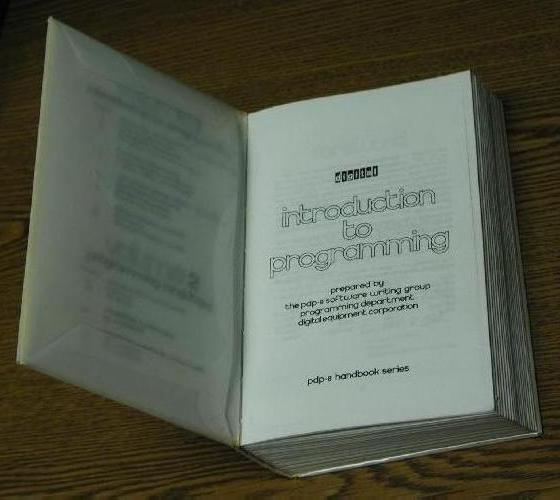
The 11" by 17" paper I used (the largest size the photocopying shop could handle) wasn't long enough to fully jacket the insides of the cardboard book covers, so I used photocopies of the insides of the original cover as "end papers", gluing them to the dust jacket (but not to the cardboard cover) with PVA cement after the dust jacket was folded on. One of these "end papers" is visible in Figure 8.2. You'll need to clamp the book shut to keep the paper flat while the glue dries, but this raises the risk of some glue leaking out and sticking to the rest of the book. To prevent this, insert sheets of wax paper between the sheet you are gluing and whatever it shouldn't stick to.
|
You should be able to remove your dust jacket by opening your book so far that the front and back cover are parallel and then sliding them out of the jacket. In normal use you would never expect to open a book that far, so a dust jacket made this way is unlikely to fall off accidentally.
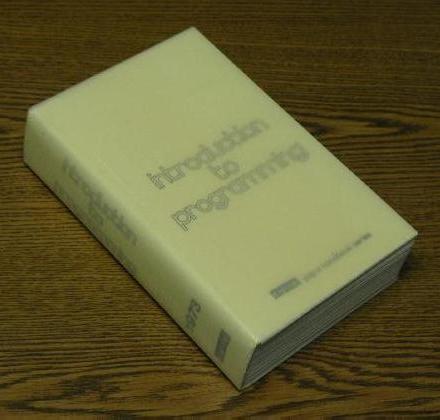
If you intend to use the book much, I recommend wrapping the paper dust jacket in a mylar jacket -- mylar drafting film is the ideal stuff. Use "magic transparent tape" to hold the mylar dust jacket on (it's also made of mylar), taping the jacket to itself, not to the book. The only difference between making the first dust jacket and any additional layers of dust jacket you might put on your book is that, where the flaps at the top and bottom of the spine (crease A in Figure 8.1) were the first flaps you folded in on the first jacket, you can do these last on any outer jackets, tucking them into the space between the inner jacket and the spine. The result is shown in Figure 8.3.
|
A book made as suggested here, using both an inner paper dust jacket and an outer mylar jacket, looks very much like a commonplace hardbound book. The air spaces between the layers of the book jacket give it a bit of a plush feel, and the hard mylar surface protects your cover art at least as effectively as the varnish and laminated plastic common in modern commercial bookbindings. Furthermore, the added height and width of the layered dust jacket protects the exposed threads at the top and bottom of the spine from abrasion; this corrects what is perhaps the most important weakness of this particular style of binding!
Do not use vinyl dust jackets! Vinyl sticks to xerographic copies, pulling the ink from the paper, and it is slightly acid, speeding the decay of the paper. The effect of vinyl is not confined to direct contact. When a stack of xerographic copies is stored in contact with a vinyl surface for a period of years, the influence of the vinyl appears to seep through the pages, causing the ink to get sticky on pages many sheets from the sheets actually in contact with the vinyl.
Polyethylene dust jackets are also compatable with xerographic copies, but they are quite soft and do not provide the same degree of mechanical protection that is offered by hard plastics such as mylar.